
Haircut and Hairstyle #007 Recipe
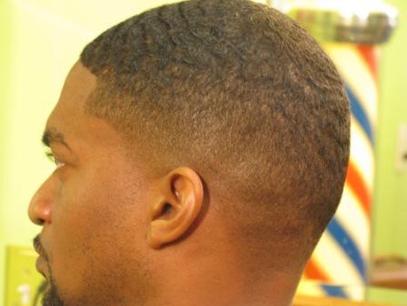
Haircut #007- (Self-Cut: Low & Tight Bald Fade with Brush Waves)
Basic Ingredients
Step 1: Using the Andis Outliner II (unadjusted blades), etch in a 1 ½ inch pattern starting at the base of the hairs natural outline all the way around the head. I began at the temporal area on one side and continue to the nape area; then, I start at the other temporal area and connect the two sections at the nape area.
Step 2: Using the Wahl Senior, I cut another 1 ½ section with no clipper guard and the Lever extended all the out or open.
Step 3: Using the Andis Pivot Pro Cipper and the smallest clipper guard in its kit: the next step is accomplished by continuing from the previously cut section to the crown all the way around the head.
Step 4: Now Continue using the Pivot Pro with the same attachment to blend hair on the top or crown of the head with the previously cut section. Note: the hair on the top is already close to the desired length, so this section lightly trimmed latter on using a clipper freehand technique.(See Videos For Blending Techniques)
Step 5: I now blend each of the previously cut sections into the next in descending order. (See my youtube videos for a variety of blending techniques)
Step 6: Since the hair at the top/crown is already close to desired length; I commence to lightly trim, shape and blend in the crown using the Andis Master and a freehand cutting technique. Freehand cutting is risky, and I did “nick” myself a little. Freehand involves silhouette cutting. In other words, with the freehand clipper cutting technique, the clippers float freely over the surface of the head cutting hair, most often without a clipper guard. While the clippers ideally do not contact the head in this technique; but, you may however, steady the cutting stroke by resting a part of your hand or a finger against the head.
Step 7: Finally, I commence to line/edge up the haircut with a pair of Andis Outlinner II (which have the blades adjusted for extra close cutting).
Hair Cut # 007
